Showing posts with label HGW. Show all posts

3.03.2020

F-16C Falcon (Tamiya 1/48)

It has been a long time since my last post , but life is sometimes just too hectic to build models. But I've managed to finish this one off in under 7 months. Tamiya F-16C block 25/32 kit, with some extras: Aires F-16C/D wheel bays (4439), F-16C  cockpit set (4364) and exhaust nozzle. Wheels are resin ones from Wheeliant, missiles, bombs and airbrakes  are from BrassinHGW RBF tags were used to finish the armament. Model was painted with MRP paints, weathered with Ammo products. Base is from Uschi and the APU unit is from Hasegawa.

Markings are from Elite decals, representing F-16 named "Death Dealer" from 17th TFS/363rd operating in Desert Storm in 1991


2.05.2019

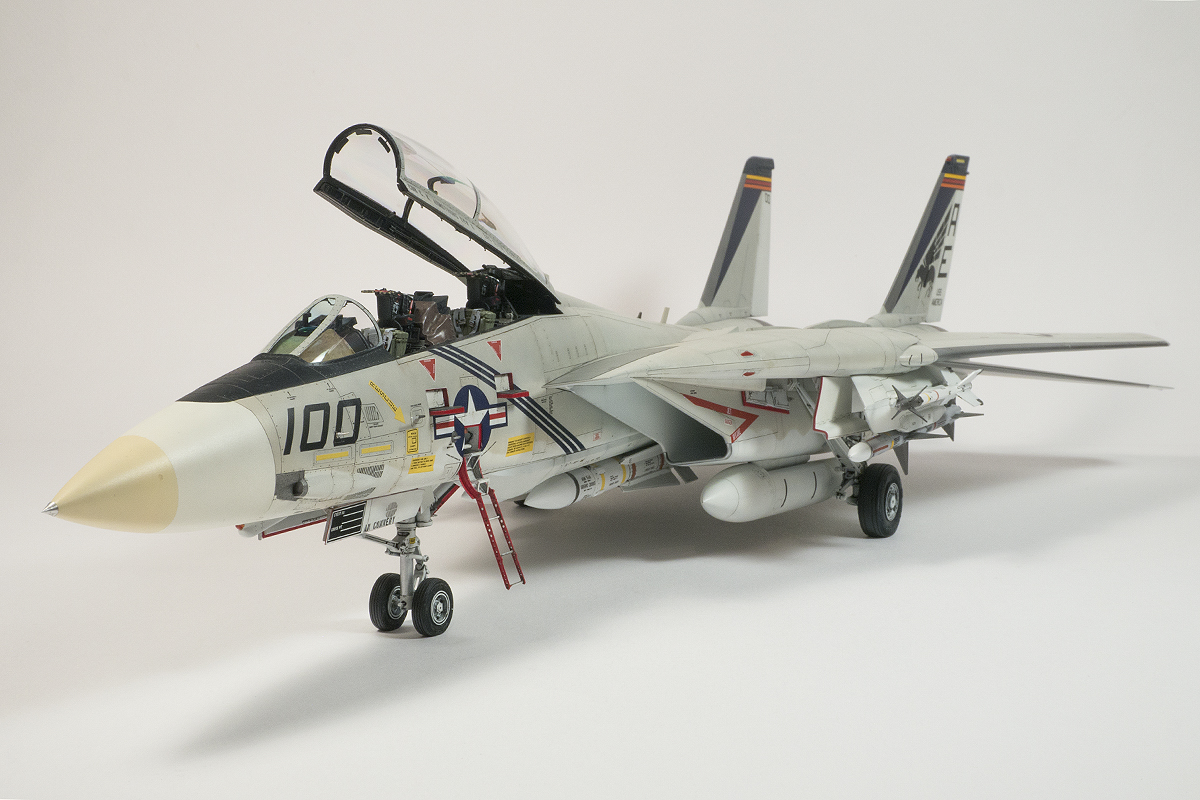
F-14A (Tamiya 1/48)

I finally managed to publish something again on my blog. This time it's in my opinion one of the best kits ever produced. Tamiya F-14A (kit no. 61114). I used quite a lot of the aftermarket items (see picture below), and some scratchbuilding was done, especially in the wheelbay areas. Resin and photoetched upgrades from Eduard (Brassin), fantastic HGW wet transfers and Furball decals were used for this build. Model was painted with MRP paints and weathered with Ammo weathering products. Markings portray an airplane from VF-143, based on USS America in 1976.


3.07.2018

Me BF-109G-6 (Eduard 1/48)

My latest build, this time Eduard's Bf-109G, flown by uufz. Georg Amon, 7./JG 53, Torazzo airfield Sicily, 1943. Probably one of the best kits ever produced, level of detail is just incredible as is the fit - no filler needed anywhere. Some details in the cockpit were scratchbuilt, the only aftermarket items are Brassin wheels and exhausts. Markings are mostly painted with airbrush using masks, stencils are HGW affair. Model was painted with MRP paints and weathered with Ammo products.


10.06.2016

HOW TO: HGW Wet transfers


Just made a quick tutorial on how using HGW wet transfers. What are wet transfers? Well, imagine a normal decal but with carrier film placed on top of graphic instead of  graphic printed on carrier film. The end result is simply stunning. I hope someone will find this tutorial useful.

1. First remove the protective foil from transfers


2. Cut out the chosen transfer with scalpel.


3. Prepair the surface with Gunze  Mr. Mark Setter (don't use anything else - this acts as a glue so the transfer sticks to the surface at the end)


4. Soak the transfer in a warm water for 15-20 seconds


5. Slide the transfer onto the surface you have previously prepaired with Mr. Mark Setter. Place it to the desired position.


6. Remove the excess setter and water with a brush, cotton swab or paper tissue.


REALLY IMPORTANT!!! LEAVE THE TRANSFERS TO DRY FOR AT LEAST 6 HOURS. BETTER STILL, LEAVE TO DRY OVERNIGHT

7. Then carefully peel off the carrier foil.


8. And clean the surface with damp cloth or cotton swab.

9. End result is simply stunning. As you can see, the roundel is the classic decal and You can notice a carrier film. Transfers however, are perfect.